1. Introduction
JobSouk is a software platform for running a job board or recruitment web site. It is built in Blazor (.NET Core) and uses an MS SQL Server database back end. The software is available on a licensed basis and is not operated as a SaaS. This means it can be customized exactly to a client's requirements, and is not dependent on the vendor to continue providing a service, thereby giving far more security for businesses basing their operation on it.
This guide provides guidance from an end-user perspective for the front end (public) area, the recruiter section, and the admin back end section. This help guide is integrated into JobSouk so help can be accessed where available from the blue question mark circles.
2. Admin
3. Recruiters
Recruiters are users who can post jobs to the system and receive applications. They cannot apply to jobs. Recruiters on some systems can operate individually. On commercial systems (where payment is required to post jobs), users must be part of a "Company".
3.1. Account
The account section can be accessed by clicking your email address top right. This lets you change your password, email address and manage 2FA (two-factor authentication, a security measure in which an authenticator app on your Apple or Android phone can be used as an additional requirement for logging into the site).
3.2. Profile
The profile page contains your display name (which can be your full name, or a name which you prefer to use publicly to identify on the site.
You can also add your phone number.
3.2.1. Company
Recruiters can be individuals, but on systems that are ecommerce-enabled, only companies can buy the credits required to post job vacancies. Therefore, every recruiter will either need to create a company record, or join an existing company.
3.2.1.1. Create a company
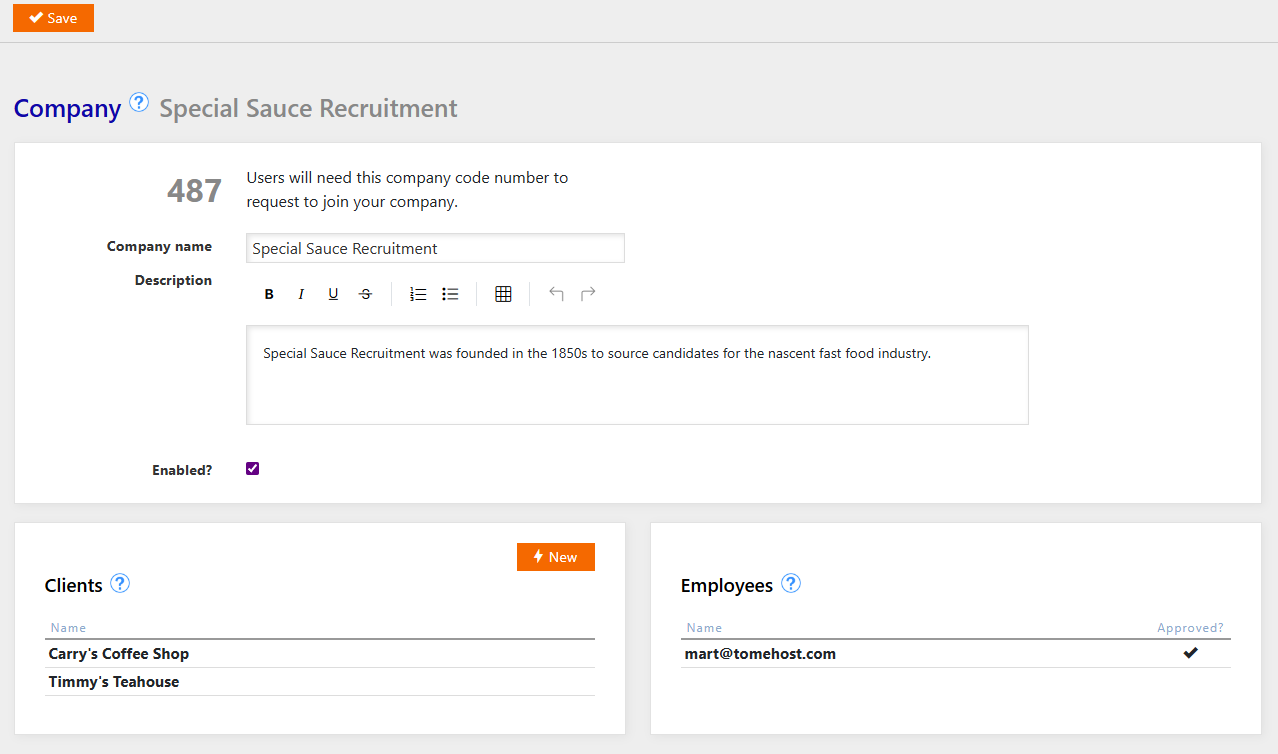
Select this option if you are the manager or administrator of your company. Creating a company allows multiple recruiters to work together. You can enter a company name. The system will allocate an ID number to your company.
On an ecommerce-enabled (commercial) JobSouk system, only users who are company owners can purchase credit. Therefore, even if you are an individual wishing to post jobs, you must first set up a company in order to be able to buy the credits required.
See @4.2. Credits for more information.
3.2.1.2. Add employees
You cannot directly create employees in your company. Instead, your staff will need to first create user accounts on the JobSouk system as recruiters.
Next, from their profile page, they can apply to join a company.
The ID number they need to apply to join your company is displayed prominently on the Company owner's company page. You will need to make sure your staff know this number.
To join a company (i.e. become "Employees" within the system) a user needs this company ID number.
One users apply to join your company, you will see them listed in the bottom right under "Employees". At first, they will not be checked as "approved". To grant them access, you will need to click to edit the employee and set them as approved.
You can also choose to delete applications from recruiters who you do not wish to grant access to, to help keep the list clear.
3.2.1.3. Clients
Clients are organizations that a recruitment company works on behalf of. You do not have to create clients, but in some cases you may recruit on behalf of a client exclusively that is a well-known brand. By creating a client list, you can set up such brands, and add a logo. When you or your employees add or edit vacancies, they will see a menu where they can optionally select a client for the vacancy. When viewing this job vacancy, the logo will show prominently. Experience suggests that jobs promoted in this way receive higher response rates.
3.2.1.4. Employees
You do not directly add new users to your company. Instead, other users who have already created accounts on the system can apply to join your company. When they do, you will see a new employee listed, but without the checkmark showing they are approved. You can click to edit the user, and approve them, or you can choose to delete the request (note that this does not delete that user's account, only their request to join your company).